Google Analytics Data Import feature will allow you to import cost data from Facebook ads & Bing ads to Google Analytics. To Get started, follow the below steps:
Step – 1: Create a Data Set in Google Analytics Data Import
- Login To Your Google Analytics account.
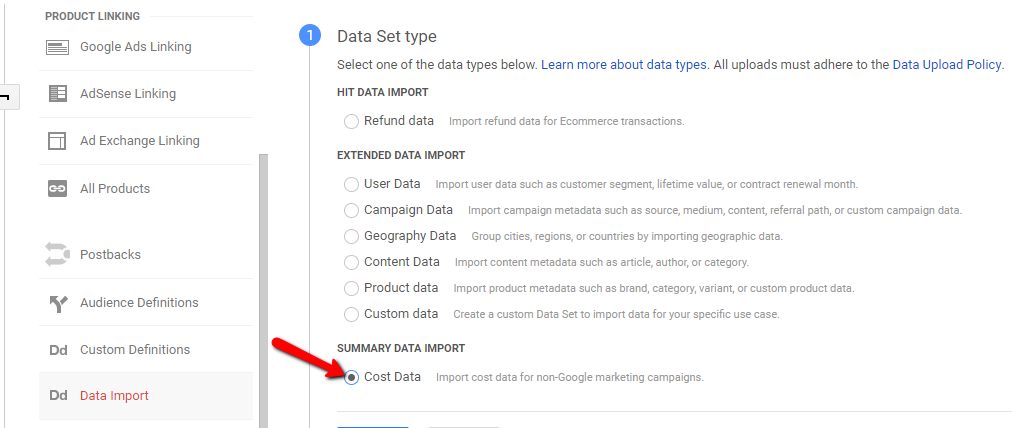
- Select Property > Go To Data Import > Click Create > Select Data Type as “Cost Data”
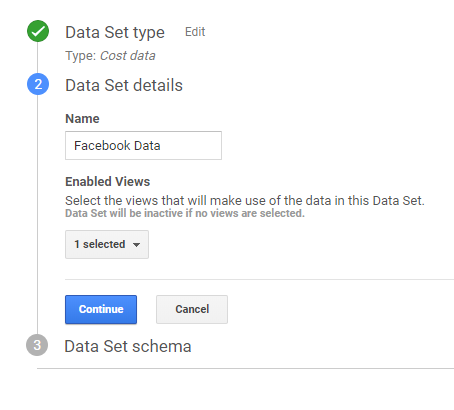
- Select a name for the data set, say ‘Facebook Ads’ > Click Continue
- Now, select the columns as follows
- Impressions
- Clicks
- Cost
- Campaign Name
- Ad Content
Note: You can even select either “Campaign” or “Ad Content” or Both. Also, the same applies to Impressions, Clicks & Cost. You can choose any fields but you won’t be able to edit it later.
Also, Make Sure To Select Import Behavior As “Overwrite”.
Step – 2: Import Query With GA Upload Format
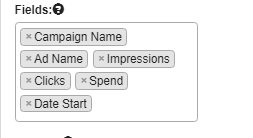
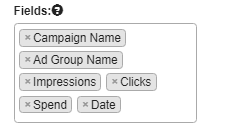
Authorize Your Facebook/Bing Accounts in Digixport. Once it’s done you can export the query with the following fields
- Campaign
- Ad Name
- Impression
- Clicks
- Spend
Or
- Campaign
- Impressions
- Clicks
- Spend
Note: This is just a recommended list of fields but you can choose the metrics based on the selected Cost Data Import fields in GA. (Optional: You can also include Search Query, Keywords, Destination URL, etc )
But make sure to map it to appropriate columns in Facebook Or Bing.
Note: If you want to use currency conversion before uploading data to GA, check field formulas.
Example:
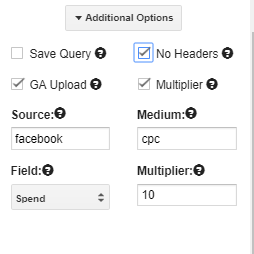
For Facebook Ads
NOTE: You can even use dynamic values for the source field, check here for more.
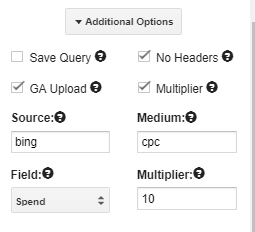
For Bing Ads:
Finally, Check The Save Query Box & Save The Query.
After exporting the data, replace the headers as follows:
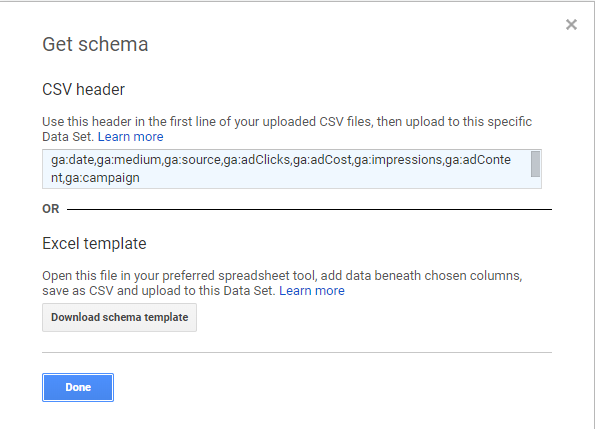
- Copy the “headers” available in the google analytics data set schema (ex: ga:campaign, ga:adCost, etc.) & paste it in the above sheet.
NOTE: Make sure to properly map the column headers
Step – 3: Upload The Query Data To Google Analytics (Manual Upload)
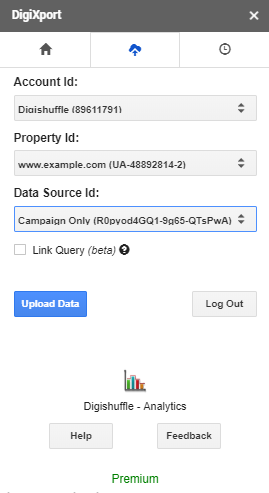
- Authorize your google account.
- Select the GA Account ID, Property ID & Dataset ID.
- Click Upload to upload the data in the sheet.
Step – 3: Upload The Query Data To Google Analytics (Automatic Upload)
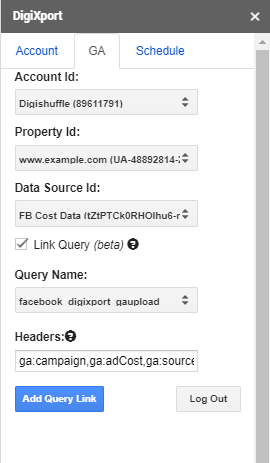
- Complete the Google Analytics Authorization & refresh the addon.
- Select the account ID > property ID > Cost data source ID. (make sure to create a cost data source in google analytics.
- Check the Link Query box & Select the Query to be linked.
(Only the queries with “GA upload” option checked will be listed here) - The Headers will be generated automatically but make sure the column ordering is correct. (NOTE: Else, you can paste the headers which were copied from the schema with correct ordering.)
- Now you can click on add query link
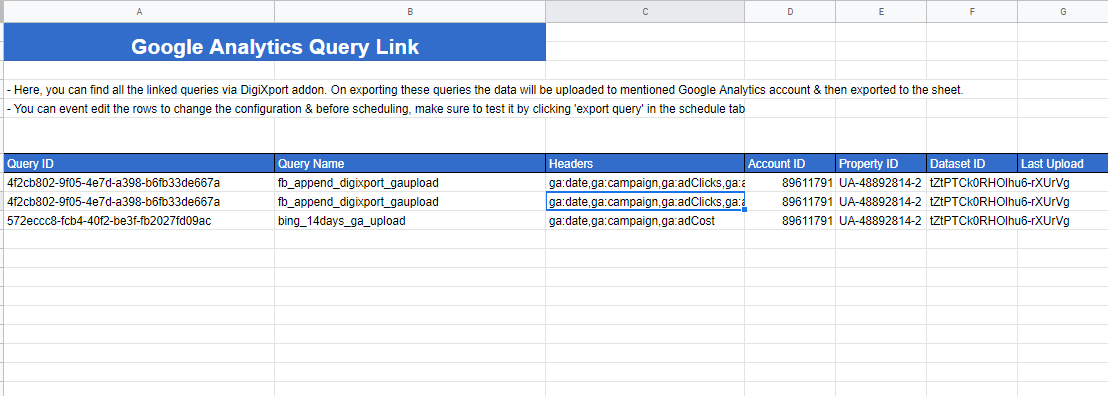
- On Clicking “Add Query Link”, you’ll get a new sheet named “DigiXport_QueryLink” with a NEW row for the query & its associated account.
- Make you have the correct “headers” & other GA configuration filled. (NOTE: You can even edit it in the sheet.)
- Once everything is done, you can test the setup by selecting the linked query in the schedule tab & clicking on “Test Queries” > “Exported Selected Queries”. Check here for more about testing queries.
- Now the data will be first uploaded to Google Analytics & then the same will be exported to the sheet. You can even check the “manage uploads” list in Google Analytics for the status of the upload. (& download the uploaded csv file)
- Once the test runs fine, you can schedule the query.
NOTE: Always test the query before scheduling it, to make sure it works as expected. Also, you can check the recent execution in the “last run” or “last upload” column(in “DigiXport_QueryLink” sheet).
To delete the link, simply delete the row from the sheet. You can refer to the whole process via the video:
