DigiXport currently uses the google scheduler to schedule the queries. The execution limit for this scheduler is 6 min (~250 – 300 sec) for Gmail users and 30min (~1500 – 1800 sec) for Gsuite users.
So when the total execution time goes beyond this limit, google will simply terminate the execution and the queries will stop working beyond that.
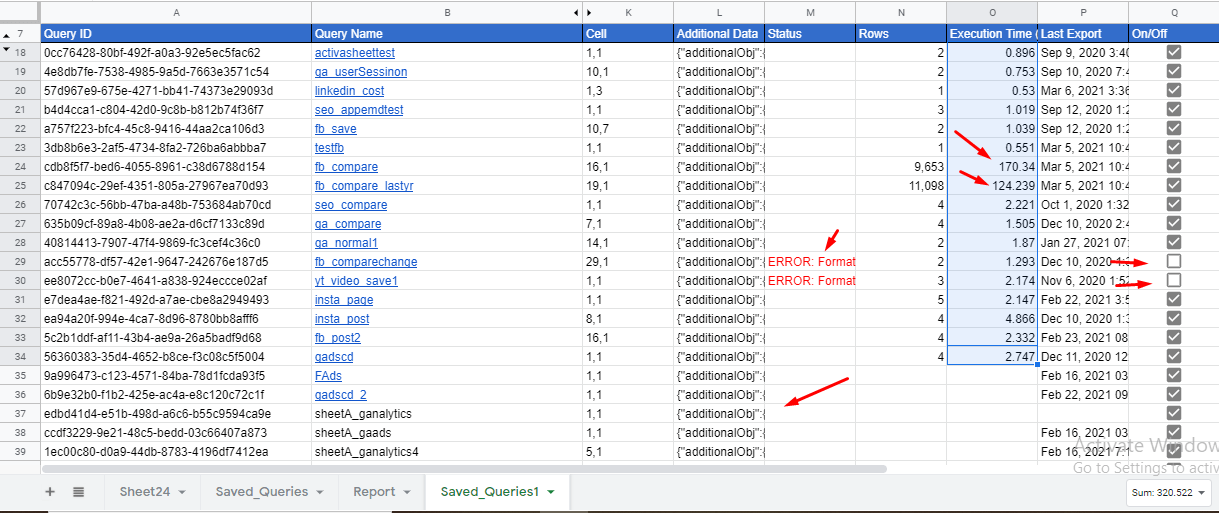
The execution starts from the top to bottom. So the first query executed will be from the 8th row in the saved_queries sheet. (and then the bottom ones)
Which queries should you optimize?
As shown in the image, you can see the execution time of 2 queries is 170 and 124 sec. These queries end up taking a lot of execution time which results in the bottom queries not working at all.
You can optimize those queries which have an execution time of more than 60 or 100 sec.
Now let’s look at the ways to optimize the query execution time.
#1 Use Create Database feature
Now let’s say you’re importing the data for the longer date range such as
- This Year
- Last 2 (or >2) Months
- & so on…
The time taken by those queries might be more. (mostly in the Facebook data source).
To counter that, you can store the old data and update the last 14 days data. Well, there’s a feature which will help you do exactly that. Here’s how it works
Here’s how you implement it. You can also follow the detailed steps here.
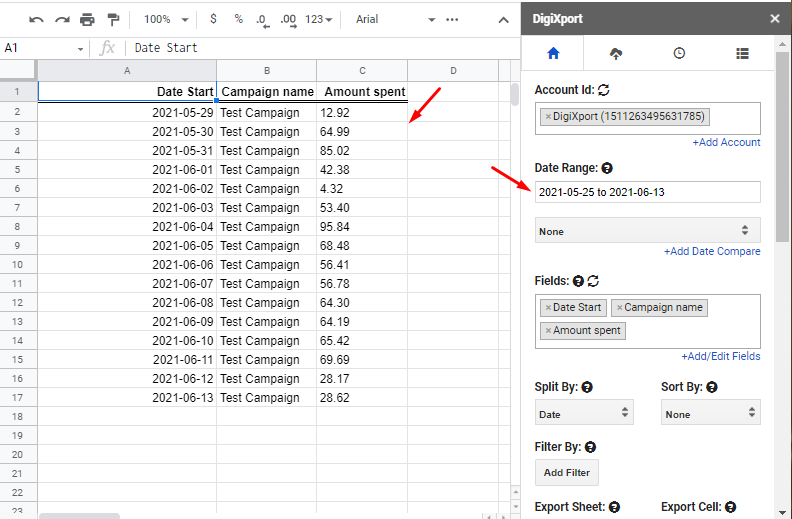
STEP 1: Import data for a any date range and check create database option
So let’s say, you want to import data with a date range of the Last 12 months or (This year). You can import the data manually by clicking on the Export button. (make sure you save this query) and also check create database option
For Eg: In the below image, data is manually imported for the date range 2021-05-29 to 2021-06-13.
NOTE: It is important to have a “DATE” field selected.
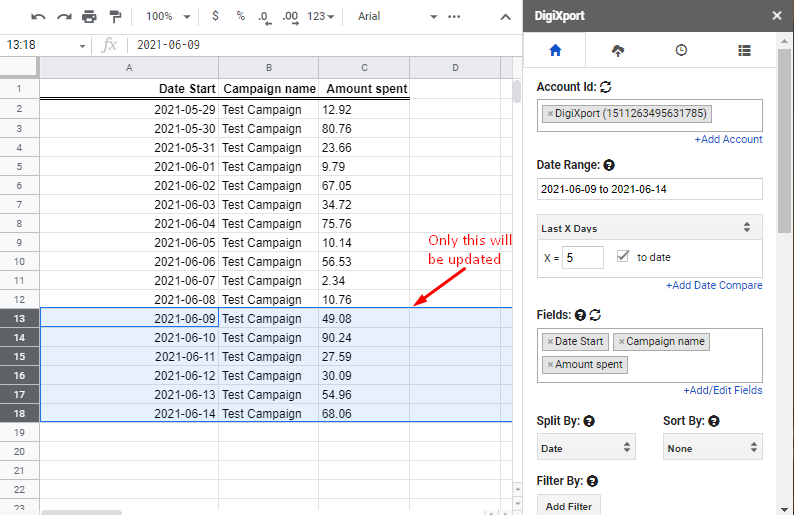
STEP 2: Schedule the query or manually run it .
For Eg: From the previous example, when the user run the query with create database checked, the new data gets appended to the old one. Also if there are any overlapping data for the previous dates, it gets updated.
Now you can simply schedule this query which will take less time for execution and data for the longer date range will also be relevant.
You can even use manual import by clicking on test queries to check if the query works correctly
#2 Avoid “Ad” related fields such as Ad name, Ad Id, etc Or multiple breakdowns OR Longer date ranges in the same query.
If you’re using the following settings in the same query, it will result in a longer execution time.
- Ad related fields such as ad name, ad id, ad url etc
- Multiple breakdowns such as platform, device, city, etc
- Longer date range
To avoid this, you can use any one of the above settings, For EG:
- If you want to include Ad name, you can avoid breakdowns or you can use a short date range (Point #1 as described above)
- If you want to have a long date range, you can avoid using ad-related fields
- and so on…
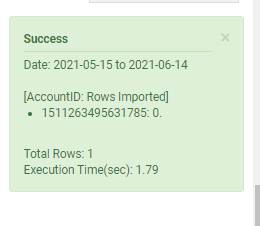
You can check the execution time of the query and then decide the ways to optimize it. You can check the execution time at the bottom when you import the data via the first tab.
#3 Remove the Queries having errors
If you have some queries which result in an error, then simply turn them off. You can do so by clicking on the checkbox in Q column in the saved queries sheet.
If these queries are ON, they will consume some execution time.
#4 Delete (OR Turn OFF) Duplicate or Test Queries.
If you have created any queries for testing or have some duplicate queries in the saved queries sheet, you can simply turn them OFF or delete them.
If they are On, they will consume the execution time.


