It is quite confusing to choose the proper method to install google tag manager on wordpress.
There are many plugins which are available free but some of them DO NOT follow google’s best practises.
We’ll be looking at 2 methods to setup tag manager in wordpress.
- Manually deploy in header.php
- Using Plugins
So let us start with 1st method:
1.) Tag Manager Setup - Manual Deploy in header.php
Step 1:
- Login to Google Tag Manager.
- Go To Admin > Install Google Tag Manager

Step 2:
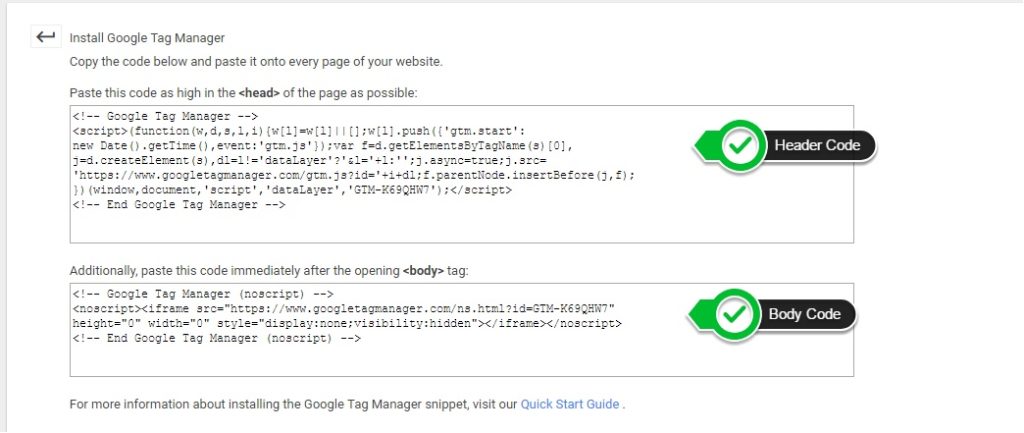
You will see 2 codes.
Header Code:
- It will trigger in javascript enabled browsers.
- As per the best practice the code should be placed high up in the <head> section
Body Code:
- It will trigger in javascript disabled browsers.
- As per the best practice the code should be placed immediately after the opening <body> tag.
Note:
The browser parses the page from top to bottom. So it is better to place Tag Manager script at near top.
The code will trigger even if placed at bottom, but might miss some hits if user migrates before complete page load.
The browser parses the page from top to bottom. So it is better to place Tag Manager script at near top.
The code will trigger even if placed at bottom, but might miss some hits if user migrates before complete page load.
- Copy these codes & open you wordpress admin in new tab.
Step 3:
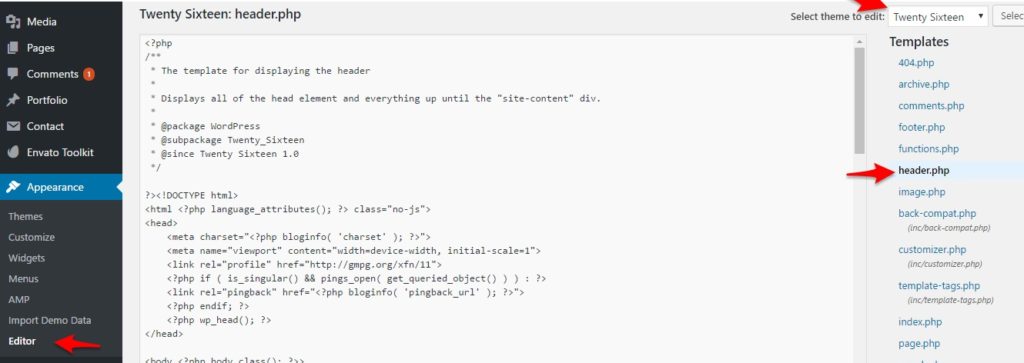
- Login To Your WordPress Admin
- Go To Appearance > Editor
- Verify the theme on the top right corner dropdown.
- On Right Side, Search & Click on header.php file.
Step 4:
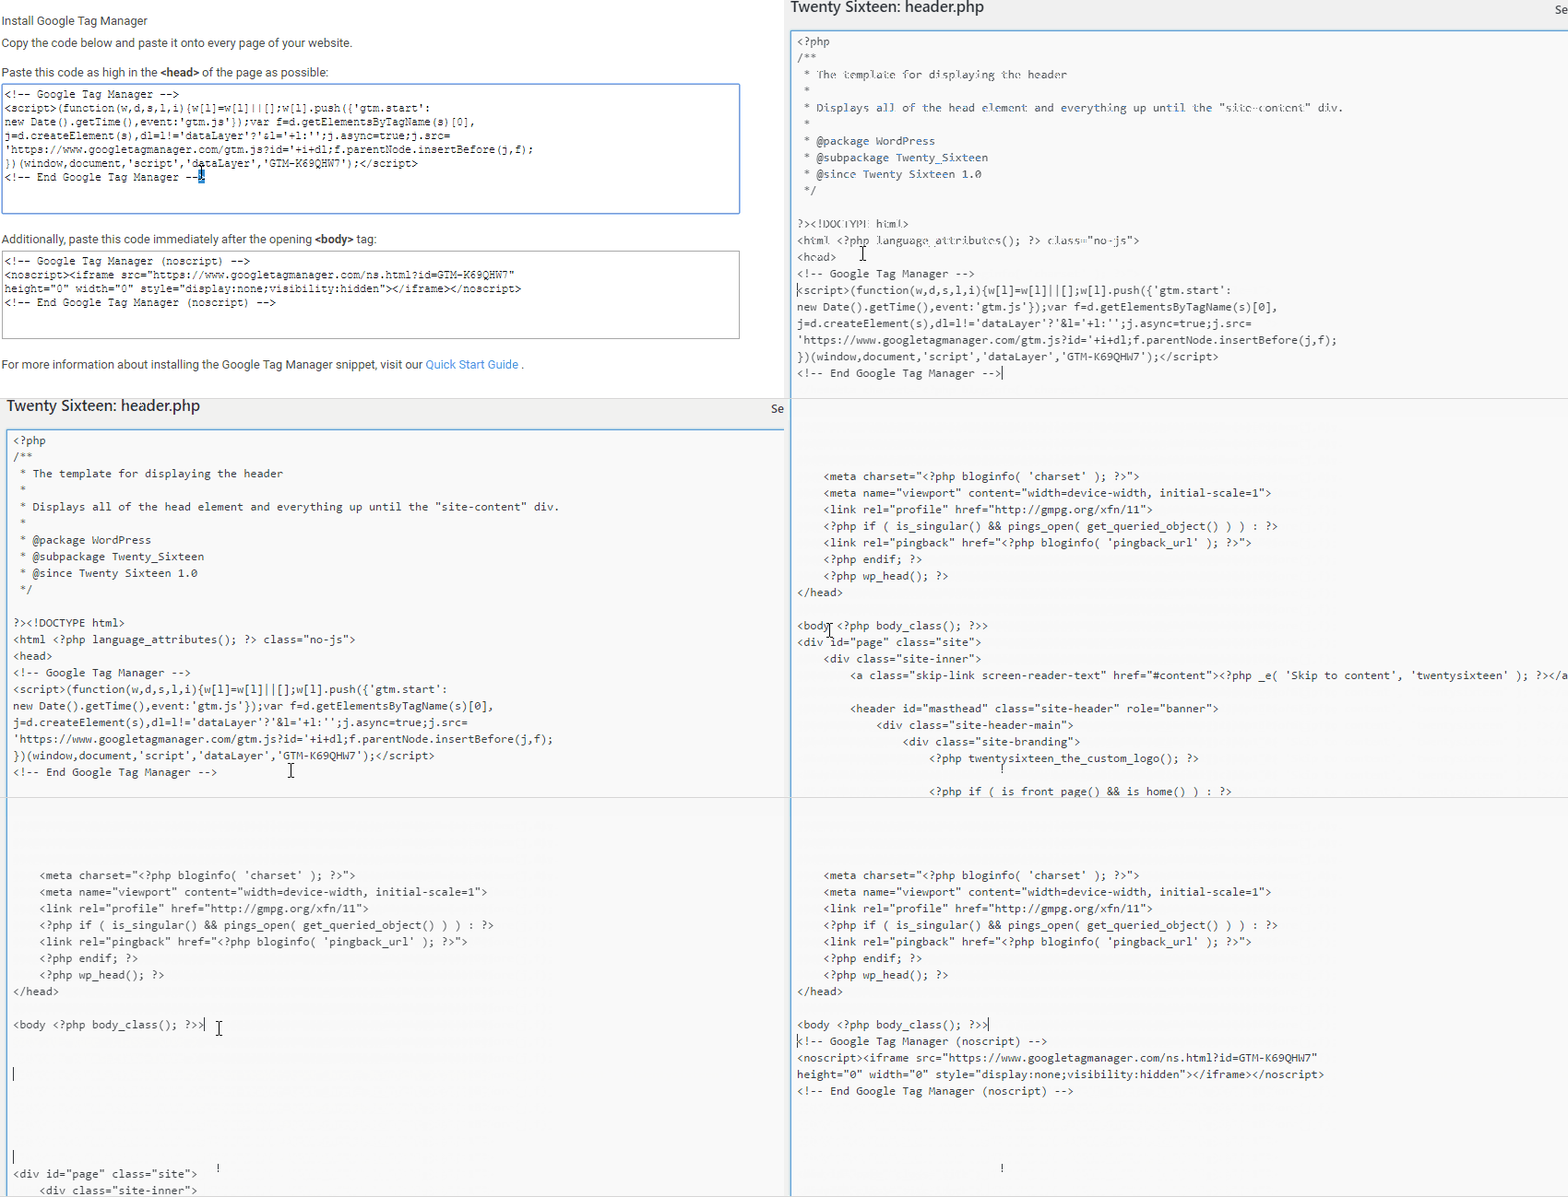
- Copy the header code & paste it immediately after thetag
- Then copy the body code & paste it immediately aftertag.
- Click on Update File.
- Click on Gif below to enlarge.
Step 5:
- Open your website in new tab
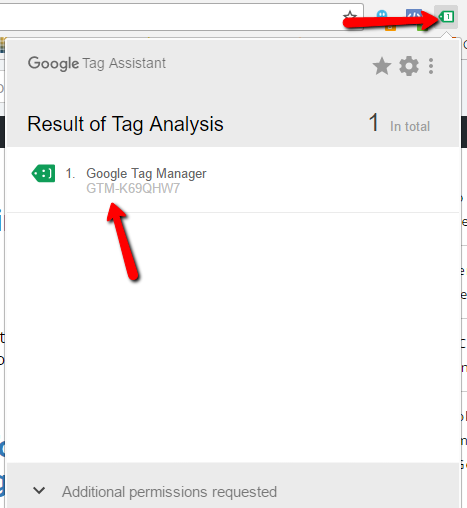
- Install the Tag Assistant Plugin
- Click on plugin icon > Enable
- Refresh the Page
- You should see Tag Manager install success.
Summary
- The Setup is quite easy & codes are placed as per google’s best practises.
- If you are using child theme, make sure to edit the child theme files & not parent theme’s.
- WP Updates might require to place the code again.
- Don’t change other code in the file. You just have to copy paste the tag manager code. You can use CTRL+Z to undo any other changes.
2.) Tag Manager Seutp - Deploy via Plugin
Step 1:
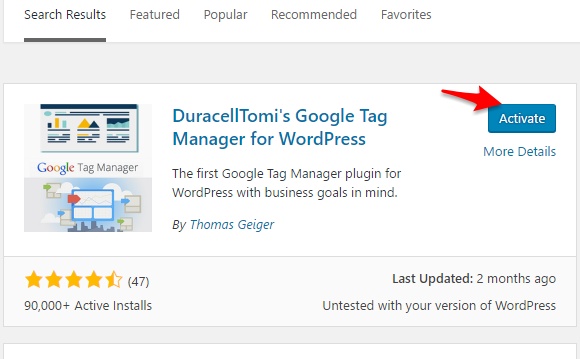
- In wordpress, Go To Install Plugin.
- Search for ‘Tag Manager’ plugin
- Install & Activate Duracell Tomi’s Tag Manager plugin.
Step 2:
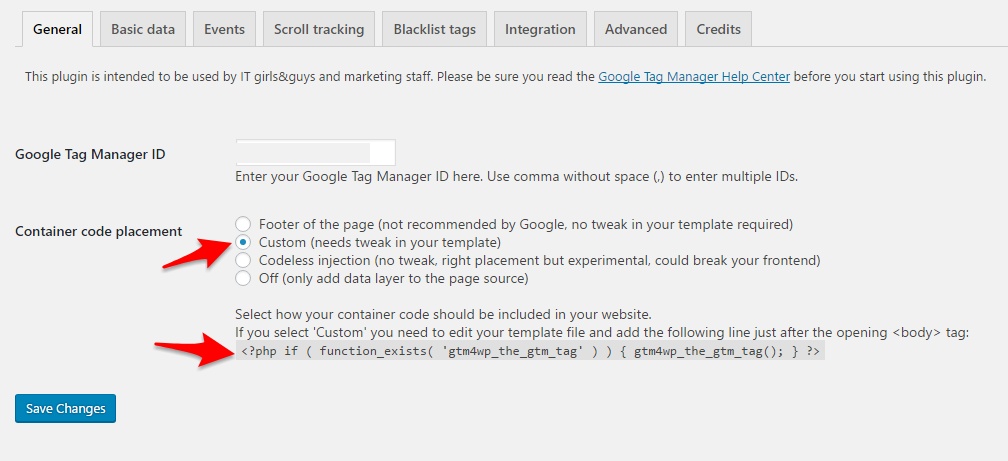
- Go To Settings > Google Tag Manager.
- In General Tab, Enter your Google Tag Manager ID. (GTM-XXXXXX)
- Select Container Code Placement > Custom.
- Copy the code php below (check image)
Step 3:
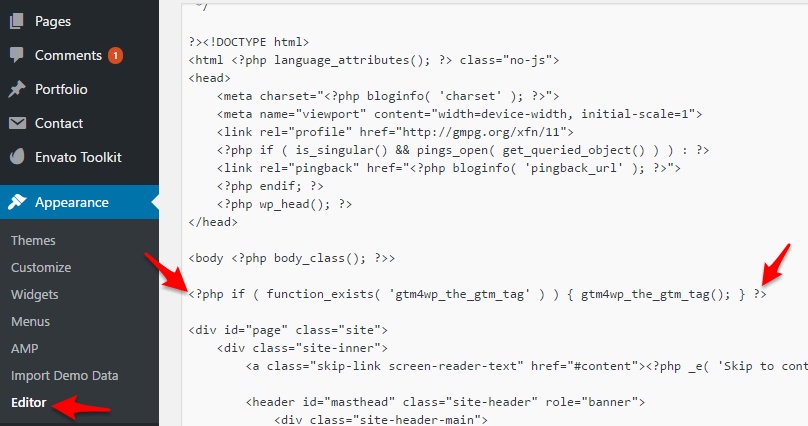
- Go To Appearance > Editor.
- Paste the copied code just below the body tag.
- Click Update.
Step 4:
- Verify the placement using tag assistant plugin as in Step 5 (GTM manual placement)
Summary
- Manual code placement is needed in both the methods.
- In plugin, you can do much more as populating the dataLayer with post type, author, date, etc.
- You can also track scroll events, form fills,etc.
- Sometimes plugins might not be compatible with your theme & not track the required data.
- You will not have to place the code again after any WP updates.
teşekkür ederiz,
faydalı ve güzel paylaşım seo açısından hangi etiket türünü seçmeliyiz ? optimize mi sağlıklı olur bilgi verebilir misiniz ? teşekkür ederim